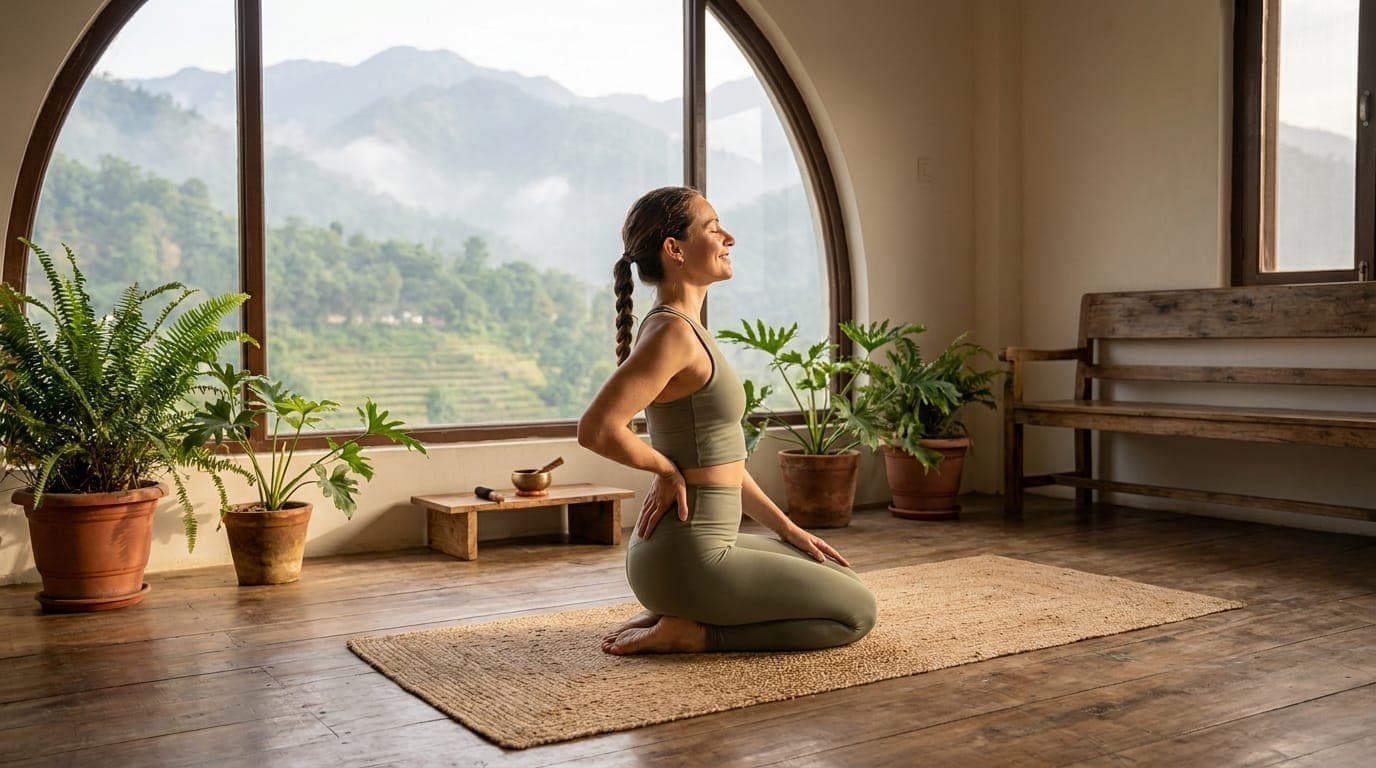
Quick answer: the 10 best yoga poses for back pain
The 10 best yoga poses for back pain are Cat-Cow, Downward-Facing Dog, Child's Pose, Sphinx, Cobra, Bridge, Legs-Up-The-Wall, Supine Spinal Twist, Pigeon and Savasana. Practised as a gentle 20–30 minute sequence five or six days a week, these poses mobilise the spine, strengthen the core and glutes that support the lower back, release tight hips, and calm the nervous system that amplifies pain. Most people feel looser after a single session; lasting relief usually takes four to six weeks of consistent practice. Always stay within a comfortable range and stop at any sharp or radiating pain.
Back pain has become a silent epidemic in our modern, sedentary world. Whether it's from long hours at a desk, heavy lifting, or simply stress manifesting physically, millions suffer daily. But there is a time-tested solution that goes beyond temporary relief: Yoga. At Swaastik Yog School, we witness the transformative power of yoga every day as students reclaim their mobility and live pain-free lives.
The 10 poses at a glance
| # | Pose | Sanskrit name | Best for | How long to hold |
|---|---|---|---|---|
| 1 | Cat-Cow | Marjaryasana-Bitilasana | Warming up the whole spine | 8–12 rounds |
| 2 | Downward-Facing Dog | Adho Mukha Svanasana | Lengthening the spine & hamstrings | 5–8 breaths |
| 3 | Child's Pose | Balasana | Gentle release & acute flare-ups | 1–3 minutes |
| 4 | Sphinx | Salamba Bhujangasana | Disc-friendly back strengthening | 30–60 seconds |
| 5 | Cobra | Bhujangasana | Posture, back & chest strength | 3–5 breaths ×2–3 |
| 6 | Bridge | Setu Bandhasana | Glutes & core (posterior chain) | 5–8 breaths |
| 7 | Legs-Up-The-Wall | Viparita Karani | Calming, restorative relief | 5–10 minutes |
| 8 | Supine Spinal Twist | Supta Matsyendrasana | Gentle spinal decompression | 1–2 min per side |
| 9 | Pigeon | Eka Pada Rajakapotasana | Tight hips & sciatica | 1–3 min per side |
| 10 | Savasana | Savasana | Nervous-system reset | 5–10 minutes |
If you're also struggling with neck issues, our guide on Yoga for Cervical Pain offers specialized relief techniques.
What are the best yoga poses for back pain?
The best yoga poses for back pain are Cat-Cow, Downward-Facing Dog, Child's Pose, Sphinx, Cobra, Bridge, Legs-Up-The-Wall, Supine Spinal Twist, Pigeon and Savasana. Together these ten poses mobilise the spine, strengthen the core and glutes that support the lower back, release tight hips, and calm the nervous system that amplifies pain. For most people the fastest relief comes not from any single pose but from a short, gentle 20-30 minute sequence practised five or six days a week. Begin with Cat-Cow to warm the spine, build into Sphinx, Cobra and Bridge for strength, then unwind with a Supine Twist, Legs-Up-The-Wall and Savasana with the knees supported over a bolster. Most students feel looser within one session; lasting change usually takes four to six weeks of consistent practice. Always stay within a comfortable range and stop at any sharp or radiating pain. These same therapeutic poses are taught in depth in our 200 Hour Yoga Teacher Training in Rishikesh, India.
Why Yoga Works for Back Pain
Yoga isn't just stretching; it's a holistic discipline that strengthens the core, improves flexibility, and realigns the spine. By practicing specific yoga poses for back pain, you increase blood flow to tight muscles, hydrate spinal discs, and correct the postural imbalances that cause pain in the first place.
To understand why this works, it helps to know what is actually happening in an aching back. The lumbar spine is designed to move, but most modern lives keep it locked in one shape — usually a slumped, flexed position in a chair — for hours at a time. When a joint stops moving through its full range, the surrounding muscles adapt by becoming either chronically short and tight or weak and lengthened. The deep stabilising muscles, particularly the transverse abdominis and multifidus, switch off. The result is a spine that has lost both its support system and its natural mobility. Pain is the body's request for change.
Yoga addresses this on several fronts at once. Gentle, controlled movement carries fresh blood and fluid into the intervertebral discs, which have no direct blood supply of their own and rely entirely on movement to stay hydrated and healthy. Mindful holding builds endurance in the postural muscles. Breath-led practice down-regulates the nervous system, which matters because pain and muscle guarding are amplified by a stressed, sympathetic-dominant state. Studies on chronic low-back pain consistently suggest that regular, gentle yoga can reduce pain and improve function as effectively as conventional physical therapy — and the people who keep practising tend to keep the benefits.
It is worth being honest about one thing: yoga is powerful, but it is not a cure for every back. Some back pain is mechanical and responds beautifully to movement. Some has a structural or medical cause that needs assessment first. Read the safety section at the end of this article before you begin, especially if your pain is new, severe, or accompanied by other symptoms.
Common Causes of Back Pain Yoga Can Help
- Postural and muscular pain: The most common type — stiffness and aching from prolonged sitting, weak core muscles, and tight hips. This responds very well to consistent practice.
- Lower-back stiffness: A spine that simply does not move much. Gentle mobility work restores range and usually eases the dull, constant ache.
- Sciatica: Pain that travels from the lower back or buttock down the leg, often caused by irritation of the sciatic nerve. Gentle, nerve-friendly stretches can help, but aggressive forward folds can make it worse — modifications matter.
- Disc-related pain: Discomfort linked to a bulging or herniated disc. Many people with disc issues improve with careful, extension-friendly movement, but they need to avoid loaded spinal flexion and twisting until cleared by a professional.
Throughout this guide we flag which poses suit which situation. When in doubt, move slowly, stay well within a comfortable range, and treat any sharp, shooting, or radiating sensation as a clear signal to stop.
10 Essential Yoga Poses for a Healthy Spine
1. Cat-Cow Pose (Marjaryasana-Bitilasana)
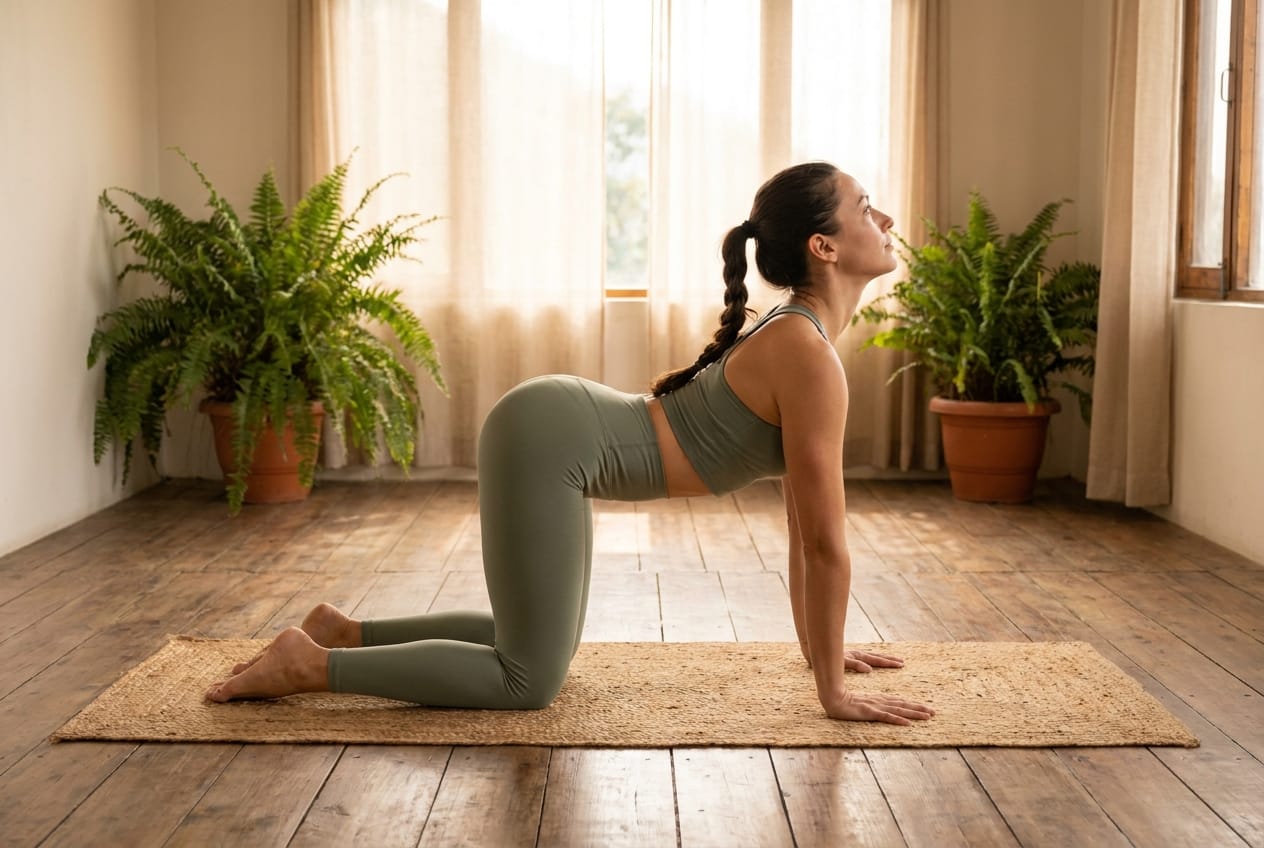
This gentle flow is the perfect warm-up. It lubricates the spinal vertebrae and releases tension in the entire back.
How to: Start on your hands and knees. Inhale as you drop your belly towards the mat, lift your chin and chest, and gaze up (Cow). Exhale as you draw your belly to your spine and round your back toward the ceiling (Cat). Repeat 10 times.
Benefits: Improves posture and balance, strengthens and stretches the spine and neck.
Alignment cues: Stack wrists directly under shoulders and knees under hips. Let the movement ripple through the spine one segment at a time rather than hinging only at the lower back. Keep the elbows soft, not locked, and let your breath set the pace — the body should follow the breath, not the other way around.
What it targets: The entire spinal column, the deep multifidus muscles, and the connective tissue around each vertebra. It also begins to reconnect breath with movement, which calms the nervous system.
Modifications: If your knees are sensitive, double the mat or kneel on a folded blanket. With lower-back stiffness, keep the range small at first and let it grow. For disc-related pain, reduce the depth of the Cat (rounding) phase and emphasise the gentle Cow extension.
How long: 8–12 slow rounds, ideally at the start of every session.
2. Downward-Facing Dog (Adho Mukha Svanasana)
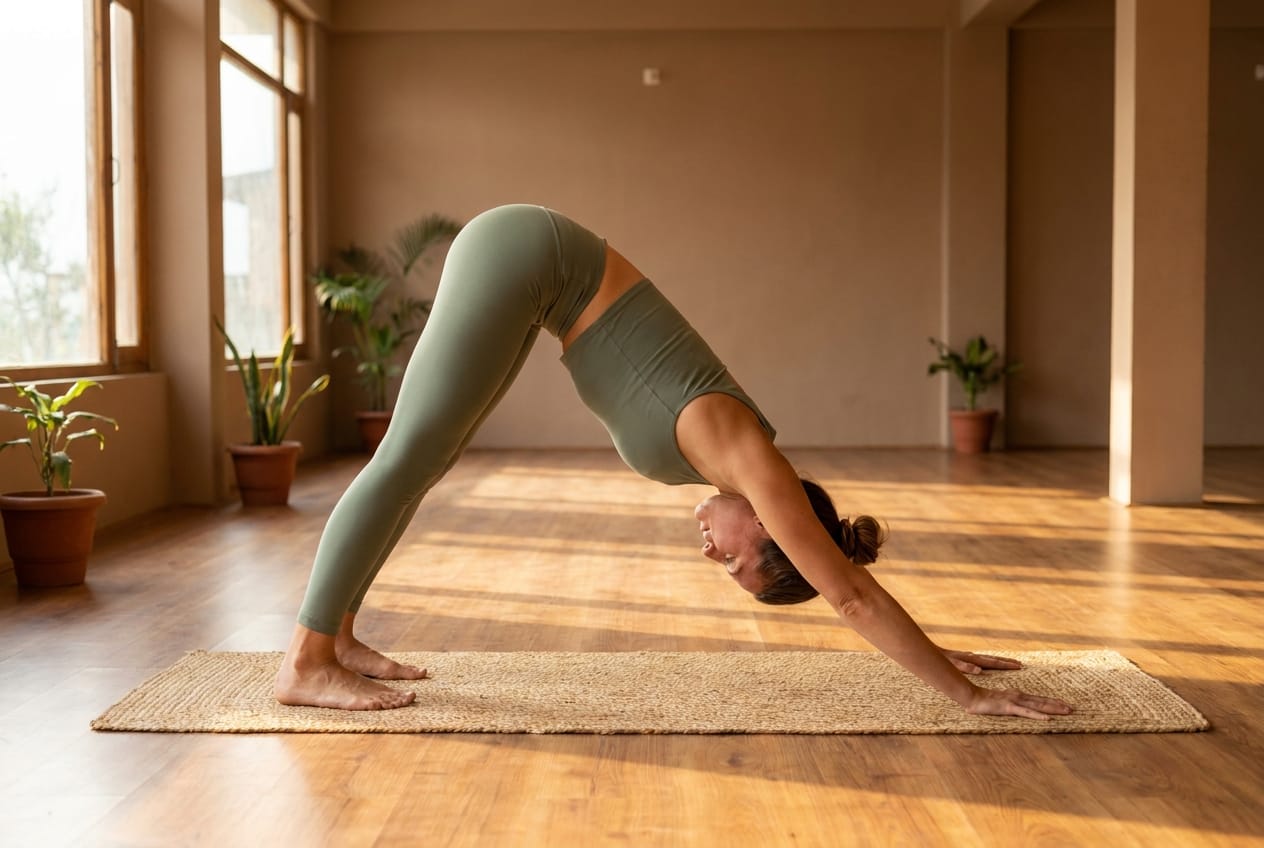
A full-body stretch that decompresses the spine and lengthens the hamstrings, which often contribute to lower back pain.
How to: From all fours, lift your hips up and back. Spread your fingers wide and press into your hands. Keep your spine long. It's okay to bend your knees if your hamstrings are tight.
Tip: Focus on lengthening your spine rather than straightening your legs.
Alignment cues: Prioritise a long, neutral spine over straight legs. Press evenly through the whole hand, especially the index-finger knuckles, to protect the wrists. Draw the front ribs in and lengthen the tailbone up toward the ceiling. A rounded lower back here is a sign the hamstrings are too tight — bend the knees generously.
What it targets: Hamstrings, calves, shoulders, and the long muscles of the back. By inverting the torso it gently decompresses the lumbar spine.
Modifications: For tight hamstrings or lower-back stiffness, keep a deep bend in the knees and lift the heels. For wrist sensitivity, practise on fists or use the forearm version, Dolphin Pose. Those with sciatica should keep knees bent and avoid forcing the heels down, as a hard hamstring stretch can tug the sciatic nerve.
How long: 5–8 breaths, or pedal the feet dynamically for a warmer release.
3. Child's Pose (Balasana)
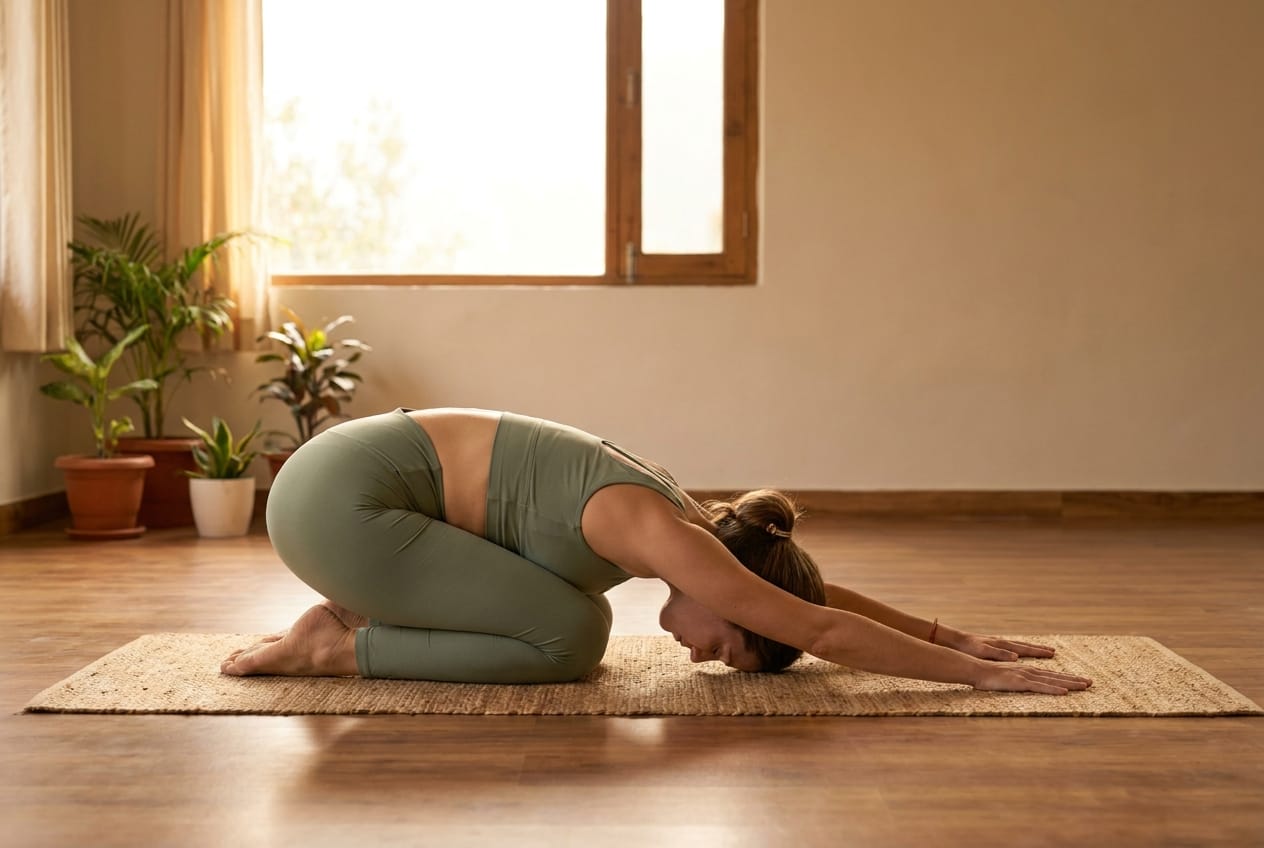
The ultimate restorative pose. It gently stretches the lower back and hips while calming the nervous system—perfect for anxiety relief as well.
How to: Kneel on the floor, touch your big toes together, and sit on your heels. Separate your knees about as wide as your hips. Exhale and lay your torso down between your thighs.
Alignment cues: Let the forehead rest on the mat or a block so the neck can fully release. Walk the hands forward to lengthen the spine, or rest them alongside the body for a more passive shape. Breathe into the back of the ribs and feel the lower back gently widen with each inhale.
What it targets: A passive, traction-style release for the entire spine, particularly the lumbar erectors, plus a gentle stretch for the hips and ankles.
Modifications: Place a bolster or stacked cushions under the torso so you can rest fully without effort — excellent for acute flare-ups. Widen the knees further for tight hips. If knees object, sit on a cushion between the heels. People with disc-related pain who find rounding uncomfortable can skip this and use Constructive Rest (lying on the back, knees bent) instead.
How long: 1–3 minutes, returning to it any time the back needs a reset.
4. Sphinx Pose (Salamba Bhujangasana)
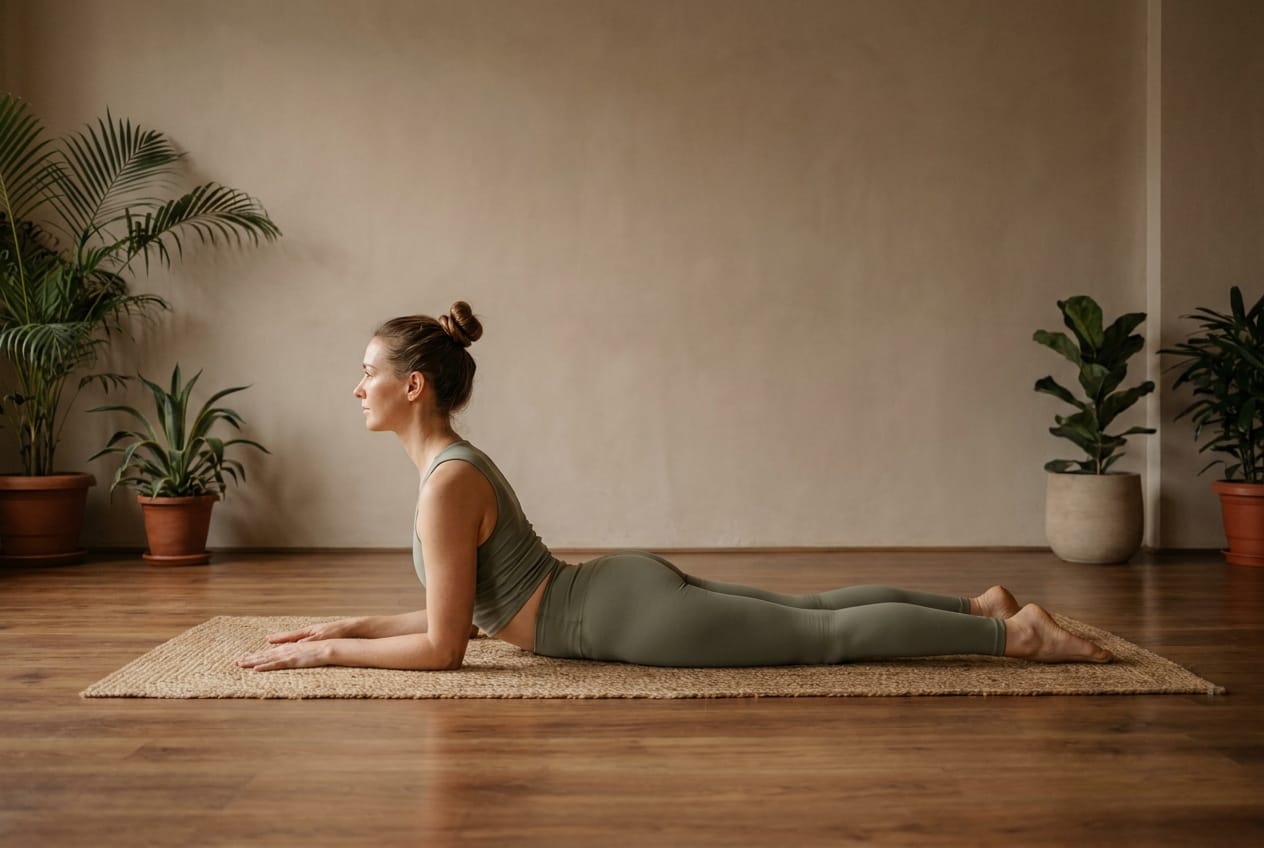
A gentle backbend that strengthens the spine without overwhelming it. Ideal for those recovering from back injuries.
How to: Lie on your belly with your legs side by side. Set your elbows under your shoulders and your forearms on the floor parallel to each other. Lift your chest and head.
Alignment cues: Keep the elbows directly under the shoulders so the chest lifts without crunching the lower back. Lengthen forward through the crown of the head as much as you lift up. Soften the buttocks and let the front of the pelvis stay grounded. The sensation should spread broadly across the back, never pinch in one spot.
What it targets: Strengthens the spinal extensors and gently restores the natural lumbar curve that hours of sitting flatten out.
Modifications: This is one of the best poses for many people with disc-related pain, because gentle extension can encourage a bulging disc to settle — but only if it feels good and does not send pain down the leg. Slide the elbows further forward to reduce the arch. For sciatica, keep the legs relaxed and the back-body soft.
How long: 30 seconds to 1 minute, building gradually.
5. Cobra Pose (Bhujangasana)
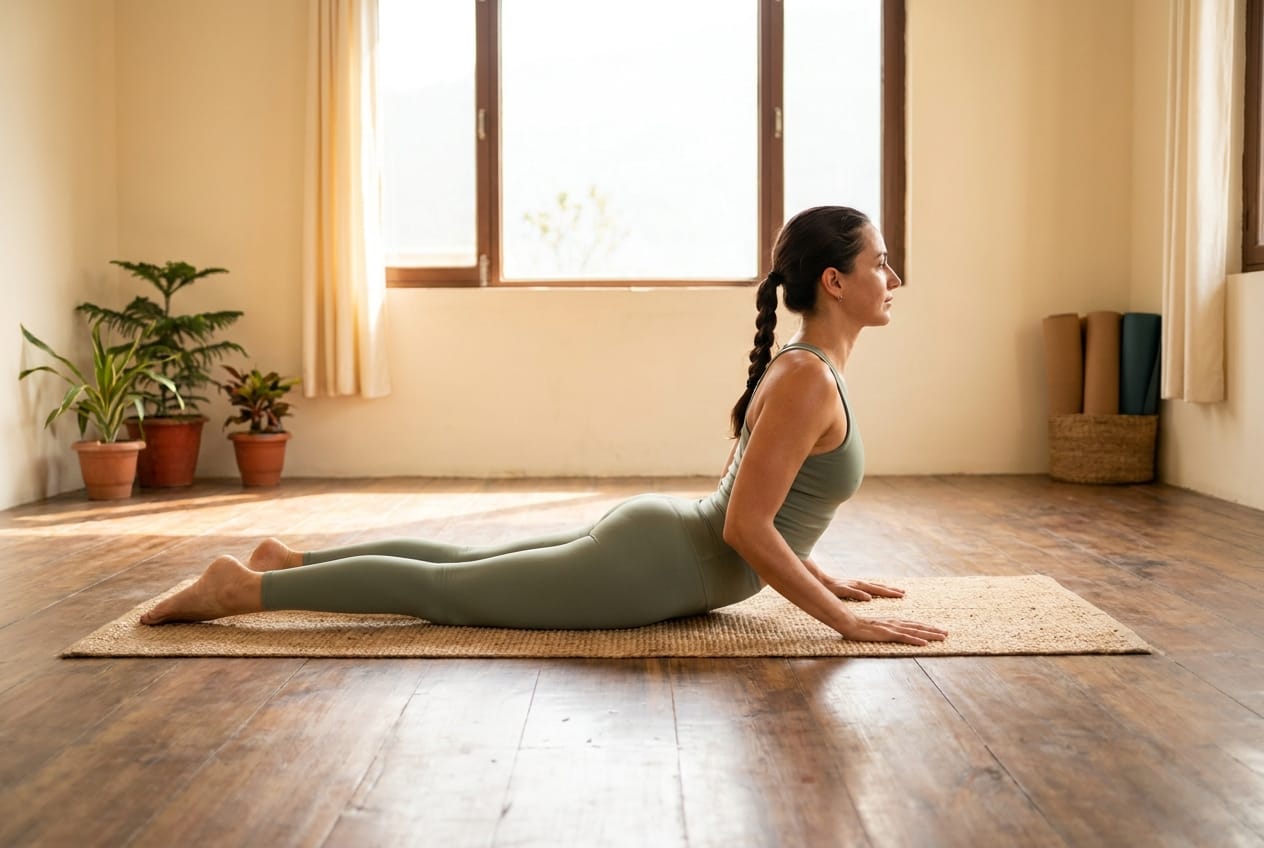
Progressing from Sphinx, Cobra strengthens the entire back and opens the chest, counteracting the "hunch" from desk work.
How to: Lie prone. Place hands under shoulders. Inhale and lift your chest off the floor. Keep your elbows close to your body.
Alignment cues: Hug the elbows toward the ribs and draw the shoulders down away from the ears. Lift primarily by engaging the back muscles, using the hands for support rather than pushing all the way up. Keep a slight bend in the elbows and the pubic bone pressing down so the work distributes evenly along the spine.
What it targets: Strengthens the erector spinae, opens the chest and front of the shoulders, and reverses the rounded posture that drives so much back pain.
Modifications: Begin with a low Cobra and only rise as high as feels supported. If Cobra causes any pinching in the lower back, return to Sphinx. Those with sciatica or disc issues should treat this as a back-strengthening pose, not a deep backbend — keep it low and pain-free.
How long: 3–5 breaths, repeated 2–3 times.
6. Bridge Pose (Setu Bandhasana)
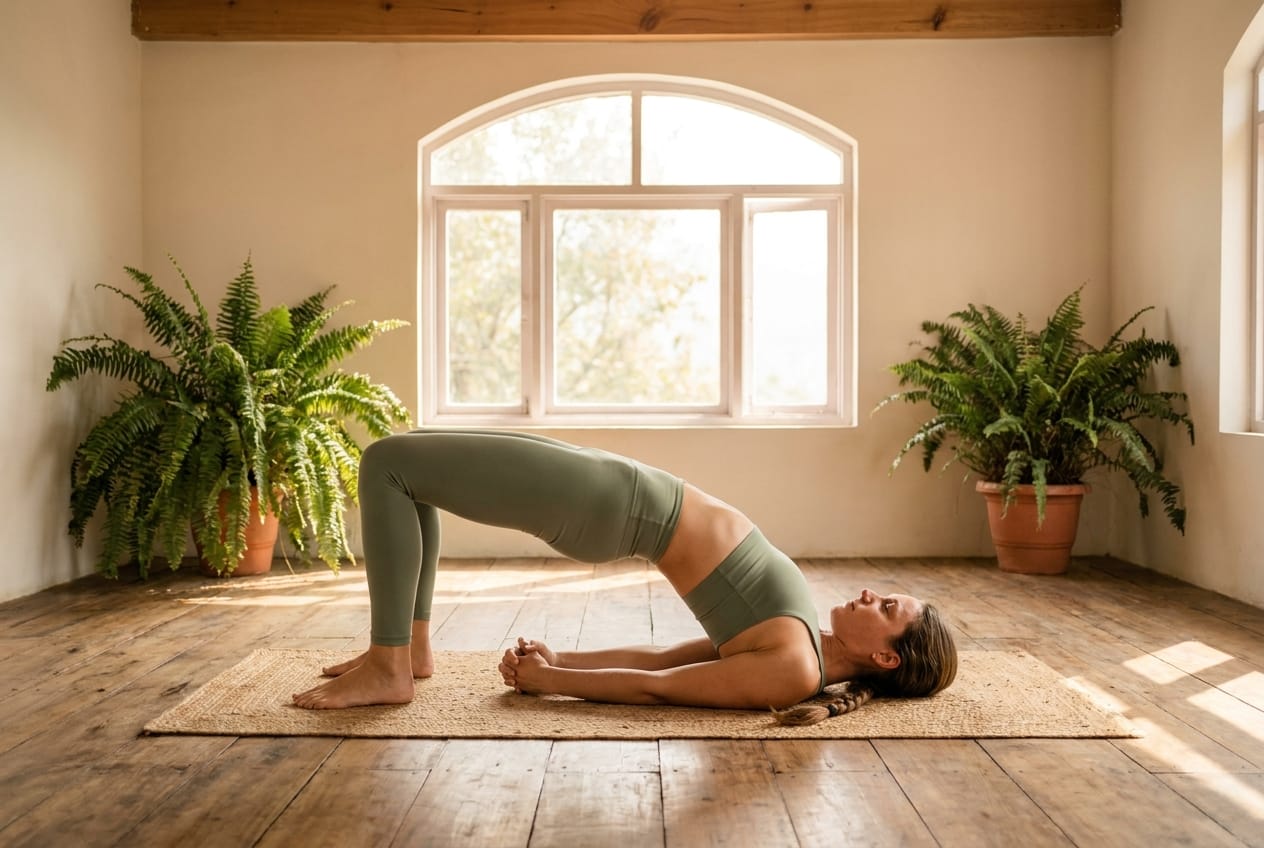
Strengthens the glutes and hamstrings—the support system for your lower back. A weak posterior chain is a common cause of back pain.
How to: Lie on your back, bend your knees, and place feet flat on the floor. Press into your feet and arms to lift your hips towards the ceiling.
Alignment cues: Keep the feet hip-width and parallel, knees tracking over the ankles. Initiate the lift by pressing the feet down and squeezing the glutes rather than arching the lower back. Keep the back of the neck long and the chin slightly away from the chest. The lower back should feel supported, not jammed.
What it targets: Builds the glutes, hamstrings, and core — the posterior chain that takes load off an overworked lower back. It is one of the most genuinely therapeutic strengthening poses for back pain.
Modifications: For a restorative version, slide a block under the sacrum and rest there passively — wonderful for lower-back stiffness and easy on a sensitive spine. People with sciatica and disc-related pain generally tolerate Bridge well because it strengthens without flexing or twisting the spine.
How long: Hold 5–8 breaths, or lift and lower dynamically for 8–10 rounds to build strength.
7. Legs-Up-The-Wall (Viparita Karani)
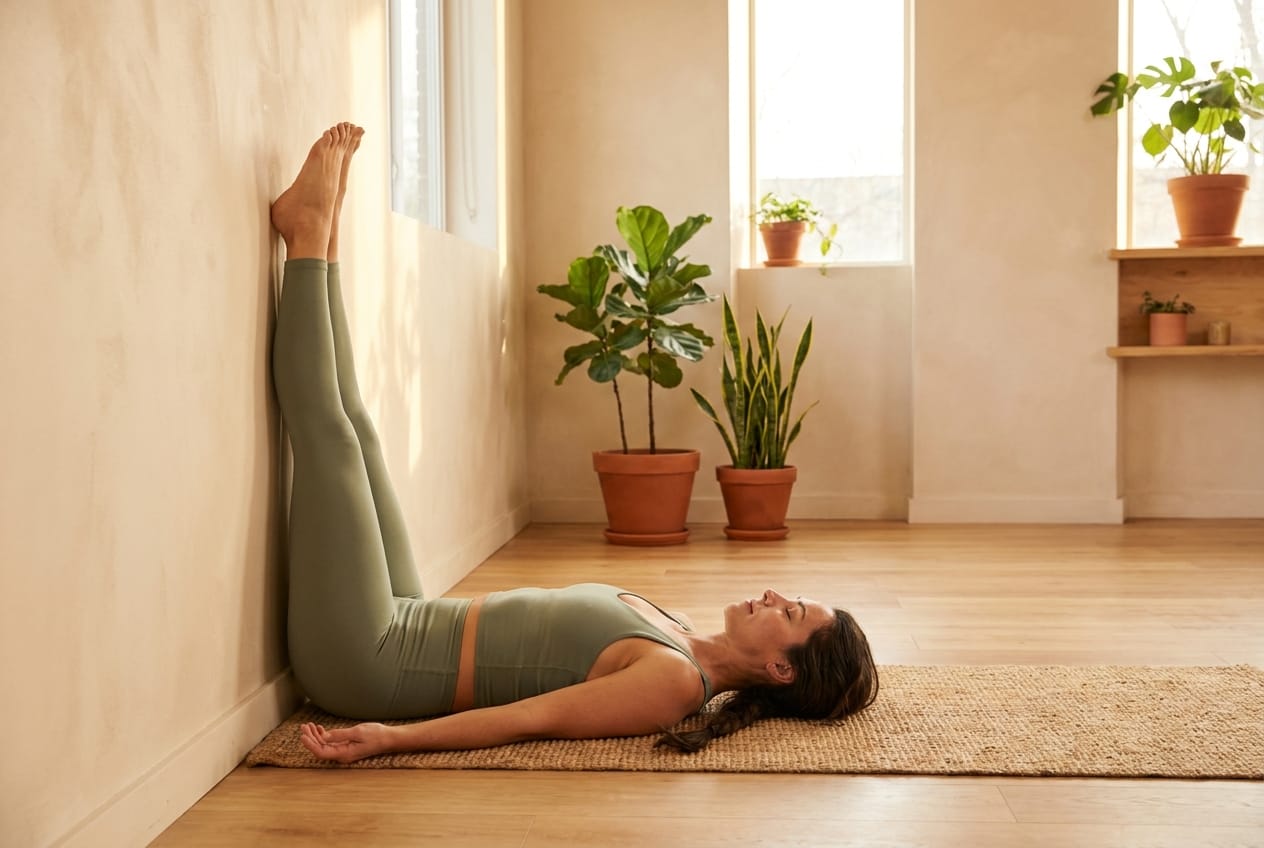
This restorative inversion allows gravity to release tension from the legs and lower back. Stay here for 5-10 minutes for deep relief.
How to: Sit close to a wall. Swing your legs up onto the wall and lie back. Rest your arms by your sides.
Alignment cues: Get the hips reasonably close to the wall, but not so close that the lower back is forced to round. Let the whole back body melt into the floor. The legs need almost no muscular effort — let the wall hold them. Soften the jaw, the eyes, and the breath.
What it targets: Calms the nervous system, eases tired legs, and gives the lower back a long, supported, gravity-assisted rest. Because pain and stress amplify each other, this pose treats the nervous-system side of back pain.
Modifications: Slide a thin cushion under the pelvis for support, or move the hips slightly away from the wall and bend the knees if the hamstrings feel tight. This is one of the safest poses here and suits almost everyone, including most people with sciatica and disc pain.
How long: 5–10 minutes. Few poses give this much relief for so little effort.
8. Supine Spinal Twist (Supta Matsyendrasana)
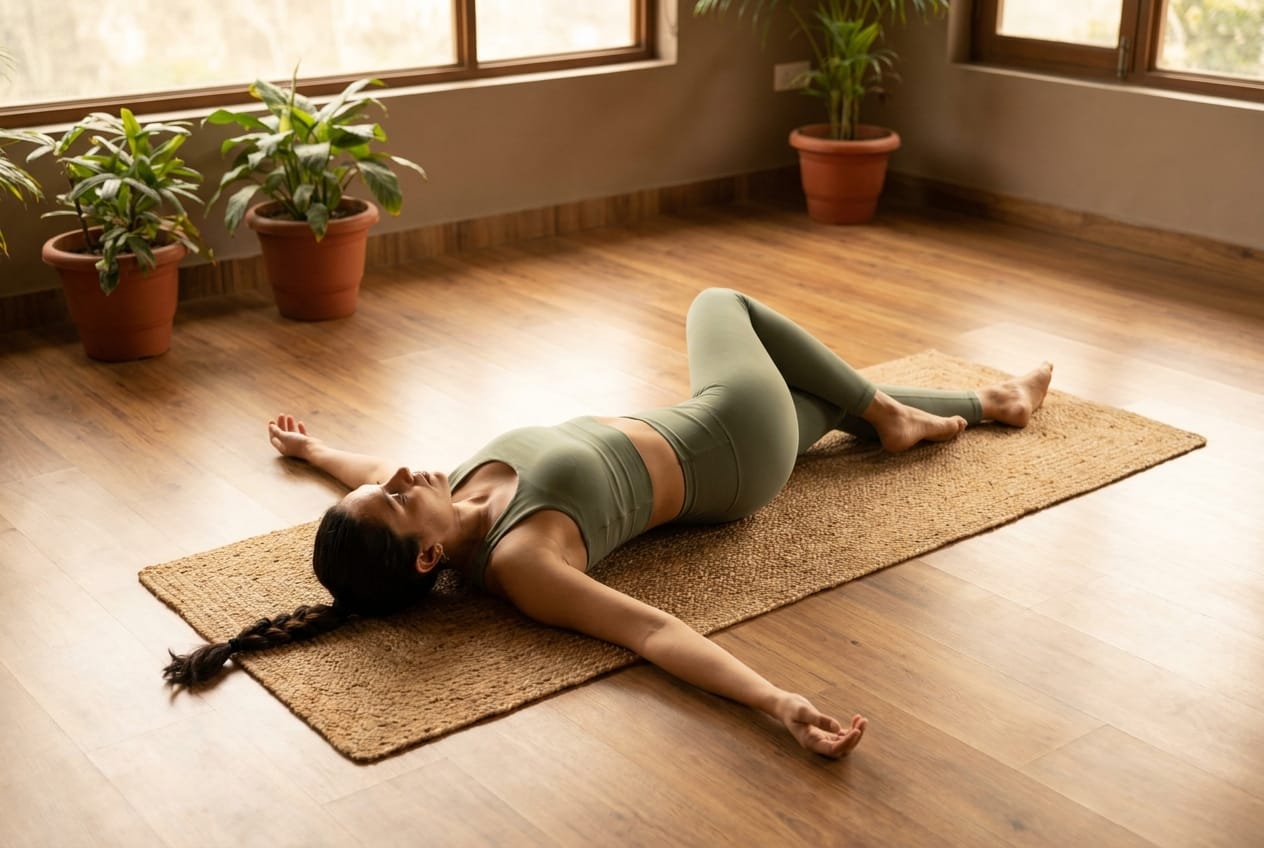
Realigns the spine and hydrates the spinal discs. A perfect way to end your practice.
How to: Lie on your back. Hug your knees into your chest. Drop both knees to one side while turning your head to the opposite side.
Alignment cues: Keep the twist gentle and supported — the goal is release, not depth. Let the knees fall only as far as the shoulders can stay grounded. If the top shoulder lifts away from the floor, place a cushion under the knees to meet you. Breathe slowly and let the body unwind a little more with each exhale.
What it targets: Releases the muscles along the spine and around the hips, and helps move fluid through the intervertebral discs.
Modifications: Always support the knees with a bolster or cushion so the twist stays passive. Important caution for disc-related pain: people with an acute disc problem should generally avoid loaded or end-range spinal twists — keep this very small and gentle, or skip it entirely until cleared by a professional. For sciatica, twist toward whichever side feels easeful and stop short of any leg symptoms.
How long: 1–2 minutes per side, near the end of practice.
9. Pigeon Pose (Eka Pada Rajakapotasana)
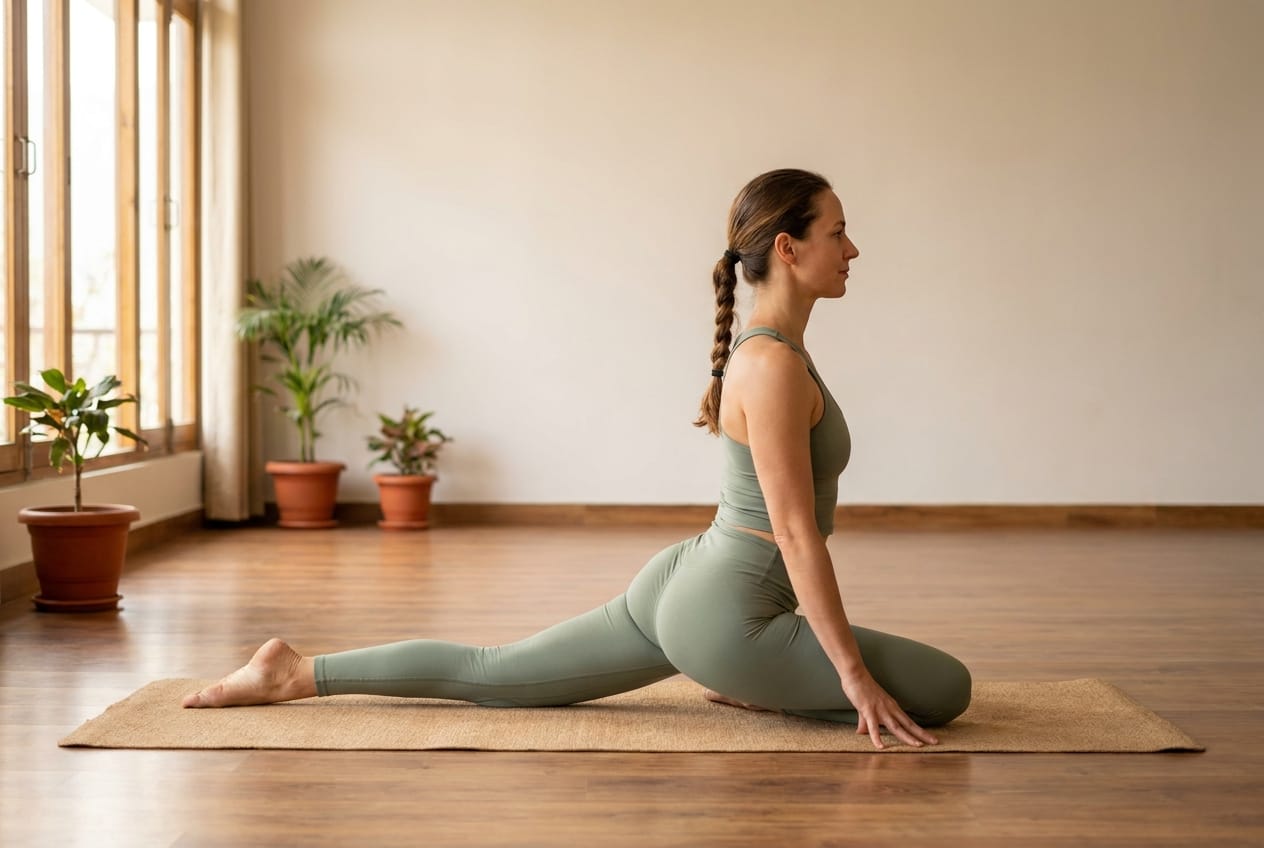
Tight hips often pull on the lower back. Pigeon pose releases deep-seated hip tension, providing immense relief for the lumbar spine.
How to: From Down Dog, bring your right knee forward behind your right wrist. Extend your left leg behind you. Fold forward if comfortable.
Alignment cues: Keep the hips as level and square as possible — let the front shin sit at whatever angle keeps the front hip comfortable. Tuck the back toes or point them; either is fine, as long as the back hip points down toward the floor. There should be a deep stretch in the front hip and buttock, never a sharp sensation in the front knee.
What it targets: Opens the piriformis and deep external rotators of the hip. Because the piriformis sits very close to the sciatic nerve, releasing it can ease the muscular component of sciatica and reduce the pull on a tight lower back.
Modifications: Always place a block or folded blanket under the hip of the bent leg so the pelvis stays supported and level — this protects both the knee and the lower back. For an easier and often safer alternative, practise a reclined figure-four (Supta Kapotasana) on your back. People with knee issues should choose the reclined version.
How long: 1–3 minutes per side, only ever in a comfortable range.
10. Corpse Pose (Savasana)
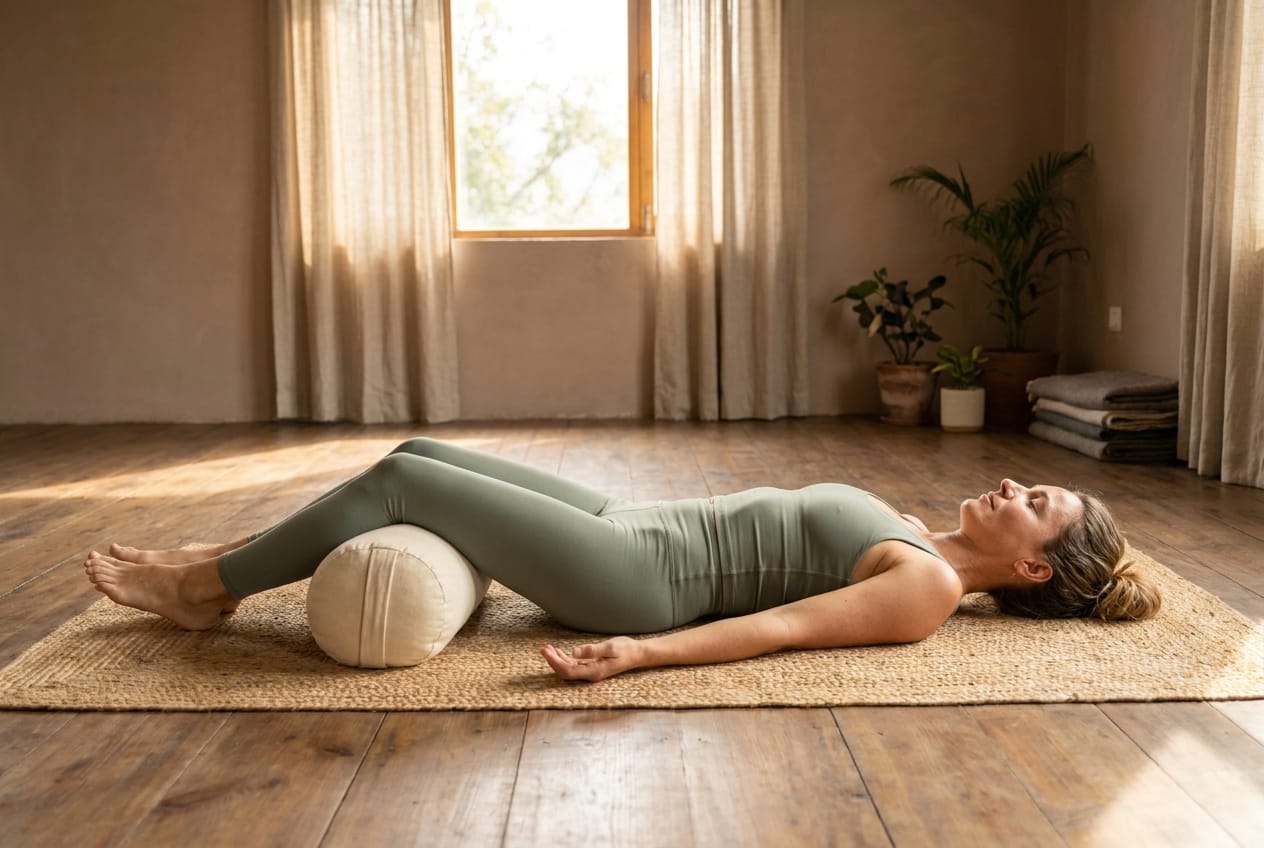
Never skip Savasana! It allows your body to integrate the practice and release any lingering stress holding your muscles tight.
How to: Lie flat on your back, arms by your sides, palms facing up. Close your eyes and relax every muscle.
Alignment cues: If lying flat is uncomfortable, place a bolster or rolled blanket under the knees — this releases the lower back and is often the single most important modification for back-pain sufferers. Let the feet fall open, the shoulders soften, and the breath find its own quiet rhythm.
What it targets: Shifts the nervous system into its rest-and-repair (parasympathetic) state. This is where tense, guarding muscles finally let go and the benefits of the practice are absorbed.
Modifications: Knees over a bolster for almost anyone with back pain. If lying on the back is not comfortable at all, rest on your side in a loose foetal position instead.
How long: 5–10 minutes. This is not optional — it is part of the treatment.
A Sensible Practice Sequence for Back Pain
Order matters. A safe practice warms the body, builds gently toward stronger work, and winds down into rest. Here is a 25–35 minute sequence you can use most days:
- Settle and breathe (2–3 min): Lie in Constructive Rest — on your back, knees bent, feet flat — and take slow breaths into the back of the ribs.
- Cat-Cow (8–12 rounds): Wake up the spine with breath-led movement.
- Child's Pose (1 min): A first gentle release.
- Downward-Facing Dog (5 breaths): Lengthen the back body, knees as bent as needed.
- Sphinx, then low Cobra (2–3 rounds each): Begin building strength in the back extensors.
- Bridge Pose (5–8 breaths or 8 dynamic lifts): Strengthen the glutes and core.
- Pigeon or reclined figure-four (1–2 min per side): Release the hips.
- Supine Spinal Twist (1 min per side): Gentle, supported decompression.
- Legs-Up-The-Wall (5 min): Restore and calm.
- Savasana (5–10 min): Integrate and rest, knees over a bolster.
Consistency beats intensity every time. A short, gentle practice done five or six days a week will do far more for a painful back than an occasional long, ambitious session. If a particular pose consistently aggravates your symptoms, leave it out — the sequence still works without it.
How Long to Hold and How Often to Practise
For back pain, longer, calmer holds usually serve better than fast flowing. Active strengthening poses such as Bridge and Cobra are held for around 5–8 breaths and can be repeated. Restorative poses such as Child's Pose, Legs-Up-The-Wall, and supported twists can be held for several minutes — this is where deep release happens. Aim for a daily or near-daily practice; the back responds to regular, kind input far better than to occasional heroic effort. Mornings ease overnight stiffness, while an evening practice can release a day's accumulated tension and improve sleep.
Yoga for Upper Back and Shoulder Pain
Most "upper back" pain is really a posture problem: hours hunched over a screen round the shoulders, collapse the chest, and overstretch the muscles between the shoulder blades while shortening the chest muscles in front. The fix is not to stretch the already-overstretched upper back — it is to open the chest and rebuild the postural muscles. From the ten poses above, prioritise Sphinx, low Cobra and Cat-Cow, and add Thread-the-Needle (from all fours, thread one arm under the other to release the rhomboids) and a gentle, supported Camel variation with hands on the lower back. Move slowly, keep the back of the neck long, and stop short of any sharp pinch between the shoulder blades. A two-minute chest-opener every couple of hours at work does more than one long session a week.
Yoga for Sciatica and Lower-Back Pain
Sciatica is pain that travels from the lower back or buttock down the leg, usually when the sciatic nerve is irritated — often by a tight piriformis muscle deep in the hip. The goal is to create space and release that muscle without tugging the nerve. The safest choices here are Reclined Pigeon / figure-four (on your back, far gentler than full Pigeon), Knee-to-Chest, supported Bridge, and a small, supported Supine Twist. During a flare-up, avoid deep seated forward folds and intense hamstring stretches — they pull directly on the nerve. The rule with sciatica is simple: a pose may produce a stretch, but the moment it produces the shooting leg pain itself, come out. If pain radiates below the knee or comes with numbness or weakness, see a physician before continuing.
Yoga for Back Pain From Sitting (Desk Workers)
If your back aches from a desk job, the culprit is usually tight hip flexors and a weak core pulling the pelvis out of neutral — not the back itself. A focused 10-minute daily routine reverses exactly that: Cat-Cow to mobilise, Low Lunge to open the hip flexors that sitting shortens, Bridge to wake the glutes and core, and a Supine Twist to decompress. You can do a seated version of Cat-Cow and a standing chest-opener at your desk mid-afternoon, then the floor sequence in the evening. Set an hourly reminder to simply stand and lengthen — the back was built to move, and the single most effective "pose" for desk-related pain is breaking up the sitting itself.
Yoga for Back Pain for Seniors and Beginners
Every pose in this guide can be made gentle enough for older adults and complete beginners by using a chair, bolster, or wall for support. Start with Chair Cat-Cow (seated, arching and rounding with the breath), supported Bridge with a block under the sacrum, Knee-to-Chest, and Legs-Up-The-Wall — all of which build mobility and ease without any risk of overbalancing. Move slowly, never force a stretch, and treat the breath as the pace-setter. Strength and range return gradually; the aim at any age is a little, often, and always within comfort. Learning these modifications once with a teacher, in a drop-in class, makes home practice far safer.
When to See a Doctor — and When NOT to Practise
Yoga is a wonderful ally for the common, mechanical back pain that comes from sitting, weakness, and stress. But some back pain needs medical attention first, and practising through it can do harm. Stop your practice and see a qualified healthcare professional promptly if you experience any of the following:
- Numbness, tingling, or weakness in one or both legs, or pain that shoots down the leg below the knee.
- Any loss of bladder or bowel control, or numbness around the groin or inner thighs — these are emergency symptoms and need immediate medical care.
- Back pain following a significant fall, accident, or trauma.
- Pain that is severe, constant, worse at night, or not relieved at all by changing position or rest.
- Back pain accompanied by unexplained weight loss, fever, or a history of cancer or osteoporosis.
- Pain that steadily worsens over weeks despite gentle, sensible self-care.
Even with ordinary mechanical pain, observe these rules: never push into sharp or radiating pain, never force a stretch, and back off any pose that leaves you feeling worse the next day. If you are pregnant, recovering from spinal surgery, or living with a diagnosed disc herniation, learn the poses under direct supervision rather than from a page. A small, gentle, well-modified practice always beats an ambitious one that flares your symptoms.
Deepen Your Practice
While these poses are effective, learning proper alignment is crucial to prevent injury. Consider joining our Drop-in Classes in Rishikesh to learn under expert guidance.
For those looking to immerse themselves fully in healing and learning, our Yoga Retreats offer the perfect sanctuary. Or, if you're ready to master the science of yoga, explore our 200-Hour Yoga Teacher Training.
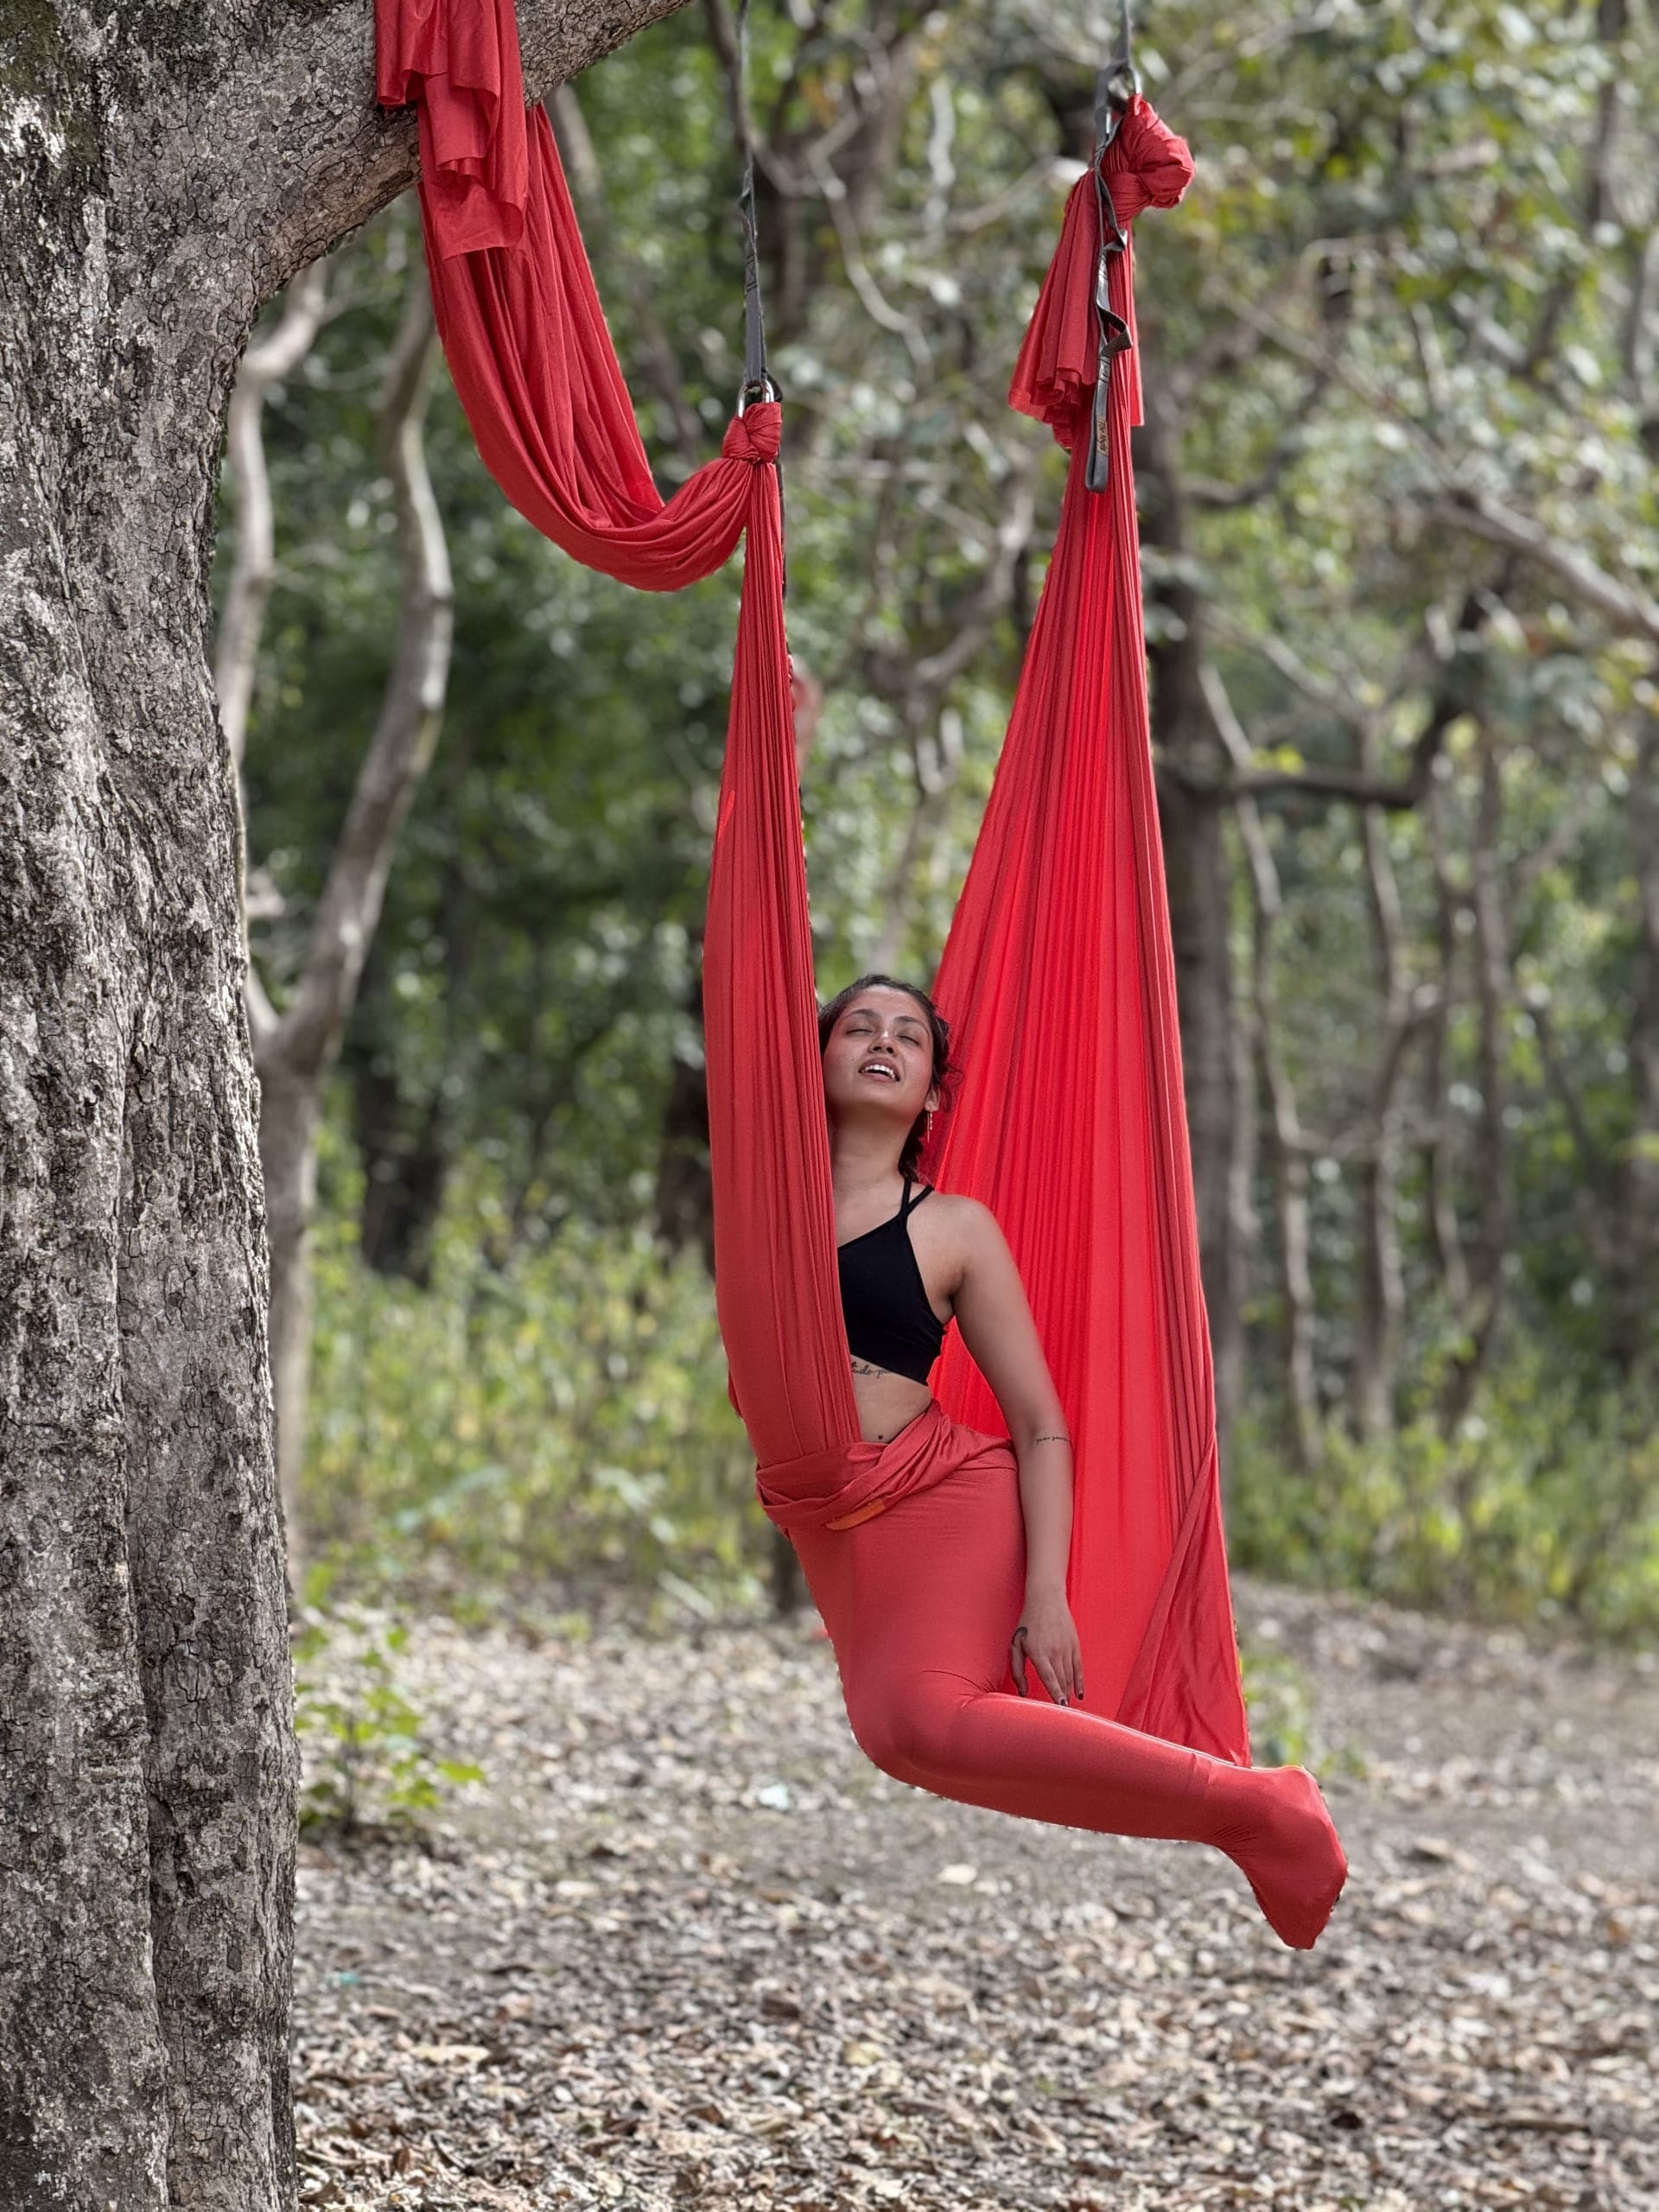
Two specialty modalities also offer remarkable relief for chronic back issues: the spinal decompression of our Aerial Yoga Teacher Training uses hammock support to gently traction the spine, while our Sound Healing Course teaches vibrational therapy techniques that release deep muscular tension.
Frequently Asked Questions
Can yoga make back pain worse?
It can, if practised carelessly. Pushing into sharp or radiating pain, forcing deep forward folds or twists with an irritated disc, or progressing too fast can all aggravate a back. Practised gently and with appropriate modifications, however, yoga is one of the most effective and well-supported approaches to mechanical back pain. The rule of thumb: movement should leave you feeling looser and easier, never worse the next morning.
How soon will I feel relief?
Many people notice a pleasant easing of stiffness within a single gentle session — that is mostly improved circulation and a calmer nervous system. Lasting change, the kind that comes from a stronger core and better-moving spine, builds over several weeks of consistent practice. Give it at least four to six weeks of near-daily, gentle practice before judging the results.
Is it safe to do yoga with a herniated or bulging disc?
Many people with disc issues do very well with yoga, but it must be the right kind. Gentle extension poses such as Sphinx and low Cobra are often helpful, while loaded forward folds and deep twists can be irritating. Get clearance from your doctor or physiotherapist first, and ideally learn under direct supervision so your practice can be tailored to your spine.
What is the best time of day to practise for back pain?
Both morning and evening have benefits. A morning practice eases the stiffness that accumulates overnight and sets up the spine for the day. An evening practice releases the tension built up from sitting and can improve sleep. Choose whichever you will actually do consistently — regularity matters more than the clock.
How often should I practise?
For back pain, daily or near-daily is ideal, even if each session is short. A focused 20–30 minute practice five or six days a week does far more good than one long session a week. The spine and its supporting muscles respond best to small, regular, kind input.
Should I keep practising during an acute flare-up?
During a sharp flare-up, scale right back to the gentlest restorative poses only — Constructive Rest, supported Child's Pose, Legs-Up-The-Wall, and slow breathing. Avoid strengthening and any end-range movement until the acute pain settles, usually within a few days. If it does not settle, or if you have leg symptoms, see a healthcare professional rather than pushing on.
What is the best yoga pose for back pain?
Cat-Cow (Marjaryasana-Bitilasana) is the single most recommended pose because it gently mobilises the entire spine in both flexion and extension without loading the discs. For most people, the best results come from a short daily sequence — Cat-Cow, Child's Pose, Sphinx, Supine Twist and Legs-Up-The-Wall — rather than any one pose in isolation.
Can yoga help with upper back and shoulder pain?
Yes. Upper back pain is usually caused by rounded shoulders and a collapsed chest from sitting. Heart-opening poses like Sphinx, Cobra (Bhujangasana), Thread-the-Needle and gentle Camel counter that posture, release the rhomboids and trapezius, and rebuild the postural muscles between the shoulder blades. Practise slowly and stop short of any sharp sensation.
Is yoga good for sciatica and lower back pain?
For sciatica, focus on poses that create space around the sciatic nerve and release the piriformis: Reclined Pigeon (Supta Kapotasana), Knee-to-Chest, Supine Twist and supported Bridge. Avoid deep seated forward folds and intense hamstring stretches during a flare-up, as they can aggravate the nerve. If pain radiates below the knee, see a physician before practising.
Is yoga safe for back pain if I sit at a desk all day?
Yes — desk workers benefit most from yoga for back pain because sitting shortens the hip flexors and weakens the core, tilting the pelvis and straining the lower back. A 10-minute daily routine of Cat-Cow, Low Lunge (to open hip flexors), Bridge and a Supine Twist directly reverses the effects of sitting. Doing it mid-afternoon at your desk works well.
Can seniors and beginners do yoga for back pain?
Absolutely. Every pose in this guide can be modified for older adults and complete beginners using a chair, bolster, or wall for support. Start with gentle, supported versions, move slowly, and never force a stretch. Chair Cat-Cow, supported Bridge and Legs-Up-The-Wall are safe, effective starting points at any age or fitness level.